CIT 100/115 Final project Report and Uploading guide
Using tables to convey information in structured documents
The CIT 100/115 final involves engaging in a project of your choosing that explores something in the world you're interested in and involves computer technology.
Jump to a section
check_boxLearning Objectives
extensionRequired report sections
bookResources and reference documents
motorcycleProject Submission Guide
Learning Objectives
| check_box | Create an original project that requires learning new computer-related skills and is interesting |
|---|---|
| check_box | Create a structured document to accompany your project to share that includes header styling, fancy tables, and a table of contents |
book
External Resources
Many free, online tutorials exist for creating structured documents and tables.
Techrepublic has a decent tutorial that involves creating simple tables, changing text direction, and guiding users through merging.
extension
Required Report Sections
Required Section List:
Please create a project report that includes at least these sections in this order. Feel free to add sections as appropriate to your project.
- Cover page with a CATCHY project name, your name, date completed, course, term, and teacher
- A table of contents on the cover page that lists each section header, any subsections, and is an active link to that content
- Project Background
- Learning Resources (in a list with links)
- Technologies and requirements (in a table)
- Timeline (in a table)
- Skills to develop (in a table)
- Description of project products (in a table)
- Ideas for further development
Sample tables for tabulated sections
Review these sample tables that show how you can arrange content for each tabulated section. You should model your table for each section after these tables. Obviously, the colors are up to you, but the columns headers and the merged cells should be included in your table as well.
Title Page with Table of Contents
The table of contents is generated automatically based on the section headers used in the document. This guide from template.net is helpful for creating the table of contents once you have the headers created already.

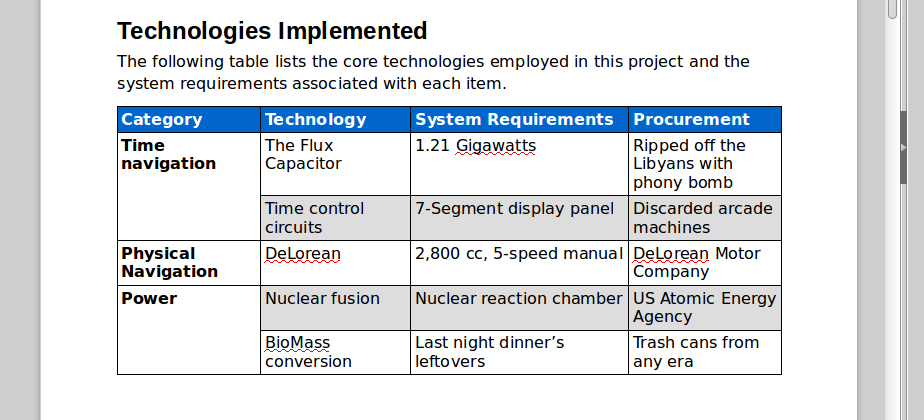
Technologies Table
Use the "merge cells" feature in MS word to combine the cells that list the categories of your technologies. You'll need to come up with categories that at least have two members such that you can make at least one merge in your table!
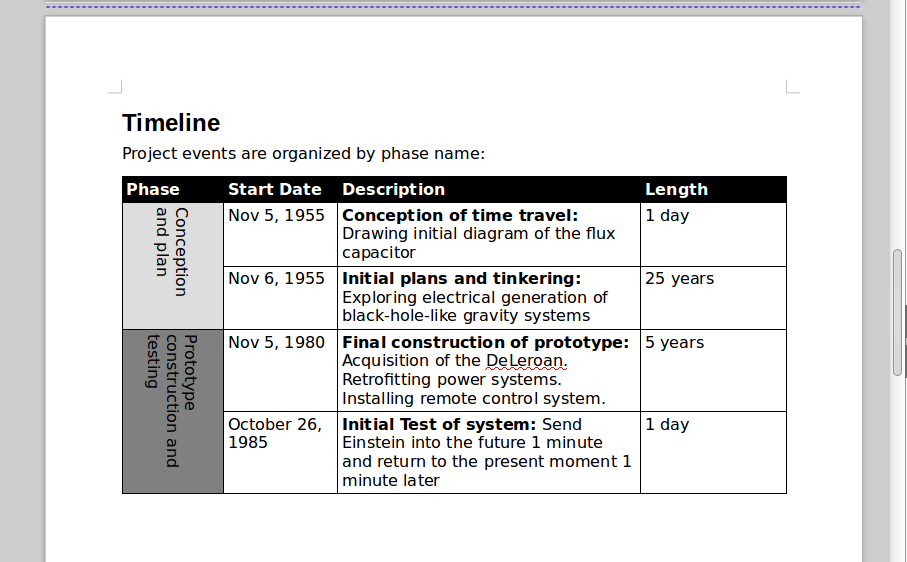
Timeline table
Change the text direction in a least two cells in this timeline table. You'll need to MERGE and then change the text direction as shown in the sample
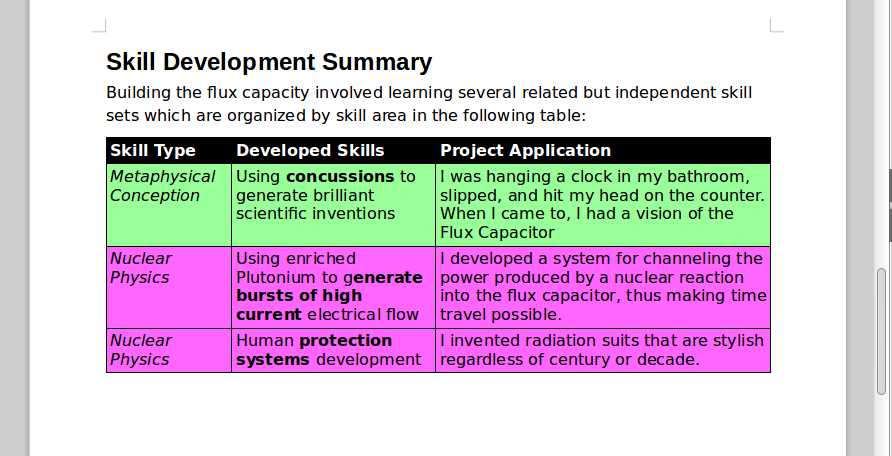
Skills to develop table
Practice color coding rows in a grouping sense: notice that the ugly pink rows are both of the skill type "Nuclear Physics". You should have at least two skills that can be grouped with colored rows
Products
Use column-focused coloring in your products table to separate out the "fields" of data, as we might in a spreadsheet.

motorcycle
Project submission and upload guide
Wrap up and share your work by following these steps precisely!
check_circleStep 1: Finish and proof your project report
You should have described your project in the project structure document we created in the steps above. Stop and make sure that you've added all the required sections, the table of contents has been updated, and all the paragraphs are error free and it's neat and tidy. This will be shared!
check_circle
Step 2: Assemble all your project files in a single directory
Create (or locate) a single directory that you can use to assemble all the parts of your project into one place. You could call this directory something like "finalProjectCIT100".
Carefully review the following list to make sure you include each of these components and make sure they are NAMED logically without spaces or strange characters:
- Your project final report EXPORTED as a PDF file. (In MS Word, navigate to File --> Export --> as PDF/XPS --> Create PDF/XPS)
- A digital version of any computer files you used in your project such as spreadsheets, HTML files, CSS files, images, graphics, graphs, links, etc.
- A few screen shots of your project's product so other students can get a flavor of your work without opening all your project files.
To create a project directory:
Open the windows file explorer and navigate to the "documents" folder. Right click the white space in that folder and select New --> folder
Leave this directory open in Windows Explorer so you can prepare your other files for uploading.
check_circle
Step 3: Capture and properly save a screen shot of your project's output
Open whatever product you've created for your project. Find a pretty screen that shows off your cool work.
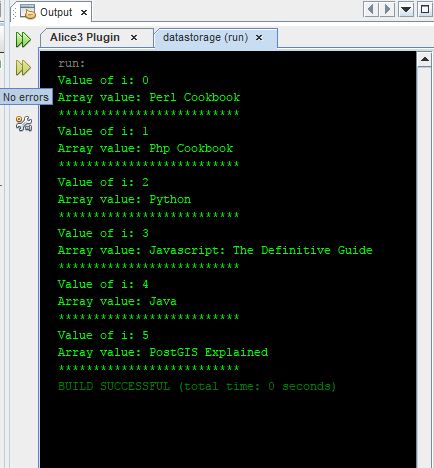
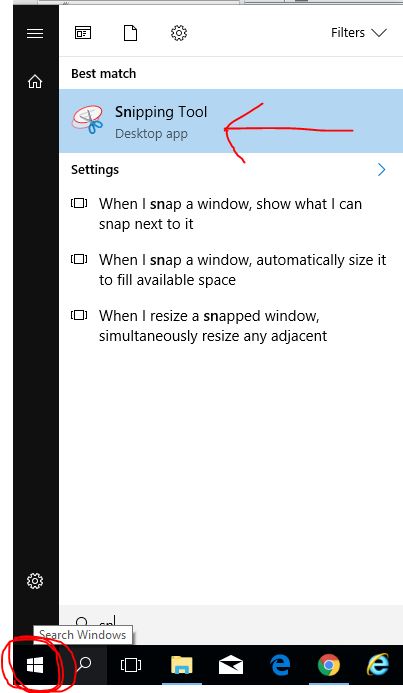
Use the Snipping tool built into Microsoft Corporation's Windows 10 operating system (click the "start" button and search for "snipping"). Your snipping should look something like this (with different colors):
Once you are happy with your clipping, save the image into the directory with your other files.
check_circle
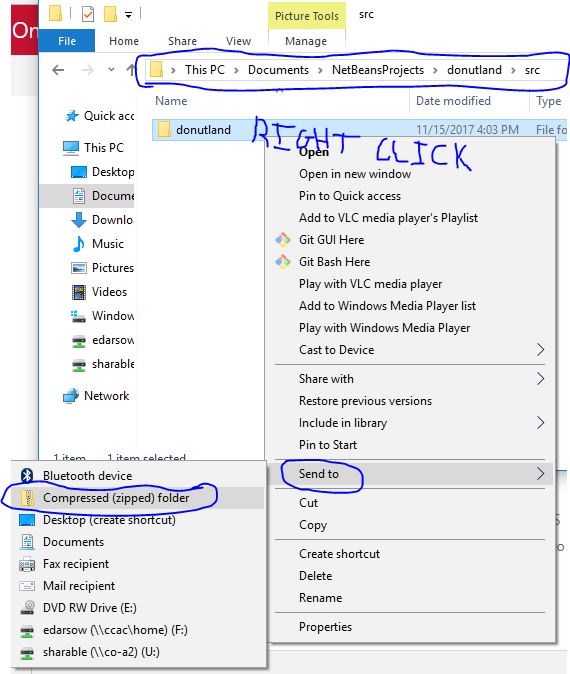
Step 4: Compress ("zip") your project directory
Check to make sure you have your report need in your directory, your screen shots, and any other files.
We want to compress the entire package director, so navigate "up" one directory so that you can see the name of the directory that contains all your files. Then, right click that directory, select "send to", then "compressed (zipped) folder"
check_circle
Step 5: Rename your zipped directory precisely
Once you have a zipped directory from the previous step, right click the file >> rename and make sure your file name follows this pattern exactly:
[class section code]_[project name]_[first name and last initial]
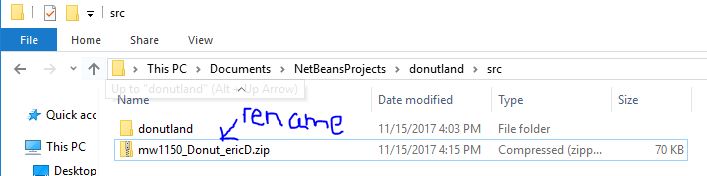
Note--don't include the [] -- replace the content with your correct data. Eric's sample file name is this:
mw1150_fluxCapacitor_ericD.zip
check_circle
Step 6: Upload the zipped file to our shared directory
Follow this link to our shared directory on the Microsoft Corporation's OneDrive
Upload your zipped project file to this shared drive. It should fit in with all the others and sort nicely
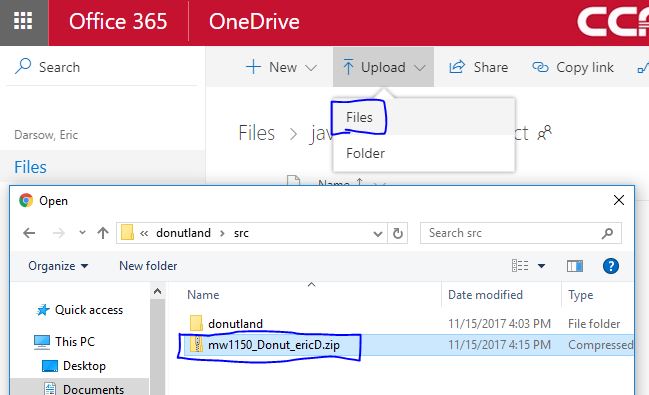
When all is well, you should see your zipped file in the shared directory and it should be named like this:

check_circle
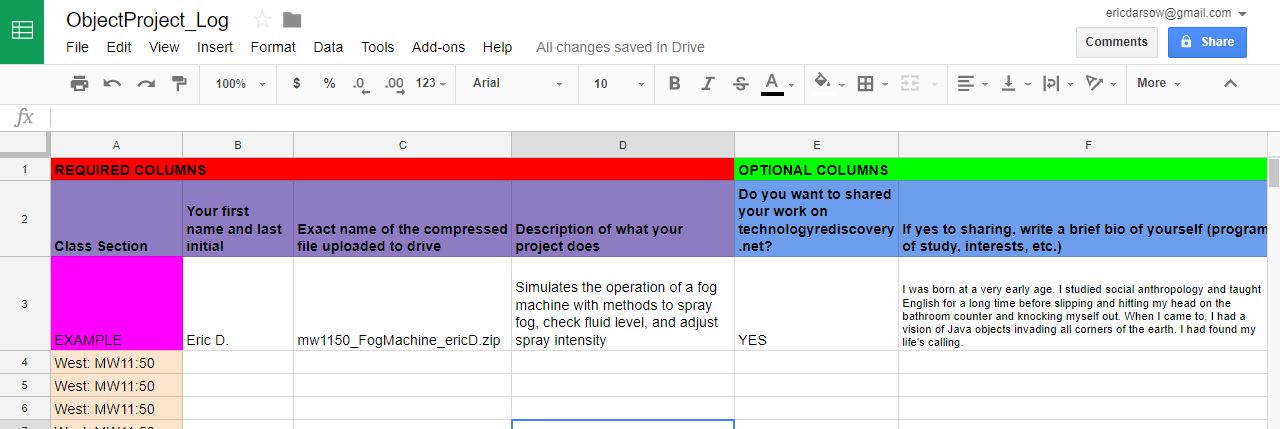
Step 7: Make an entry in our google drive log
Sharing requires some documentation. Open this shared google drive spreadsheet, find an empty row in your section's cunk of rows, and complete each column carefully.